How to get started with Anki
This article tells you everything you need to know to get started.


Guide written with Version 2.1.49.
1. Download Anki
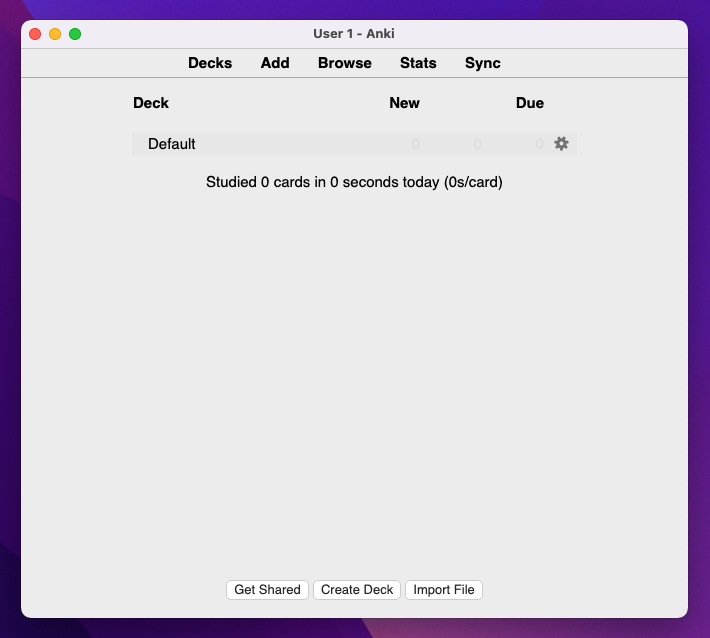
Click here to download Anki. Then open Anki.
Ta-da you now have Anki.
Here is what you will see.
2. Create an account
Before you start I would recommend making an account. This will allow you to keep your cards synced across different devices. To do this press the sync button (top right of the page). The following prompt will appear.
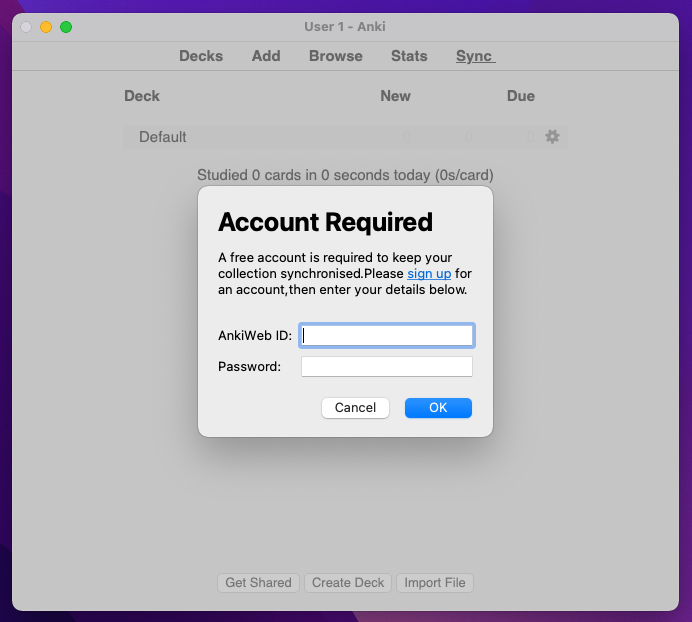
Press the 'sign up' hyperlink and then follow the instructions to create your account. Now you can login to the same account on all your devices to ensure everything is nicely synced together.
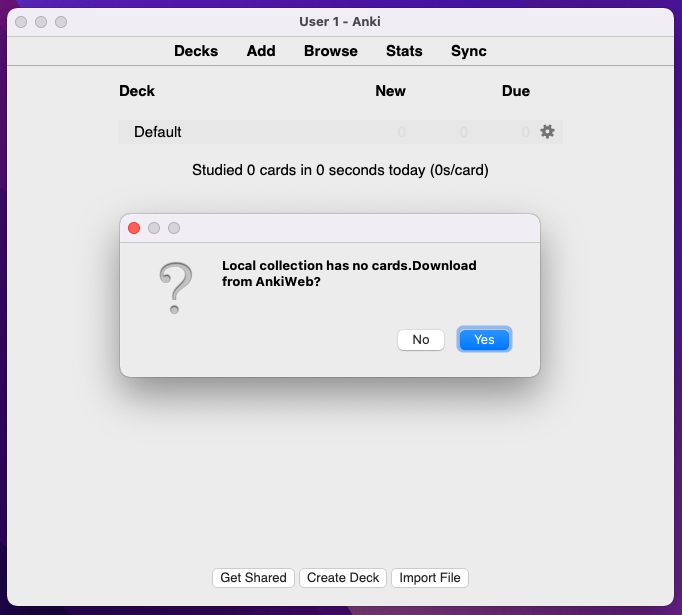
When you enter your login details you'll get the following prompt. Press 'Yes'.
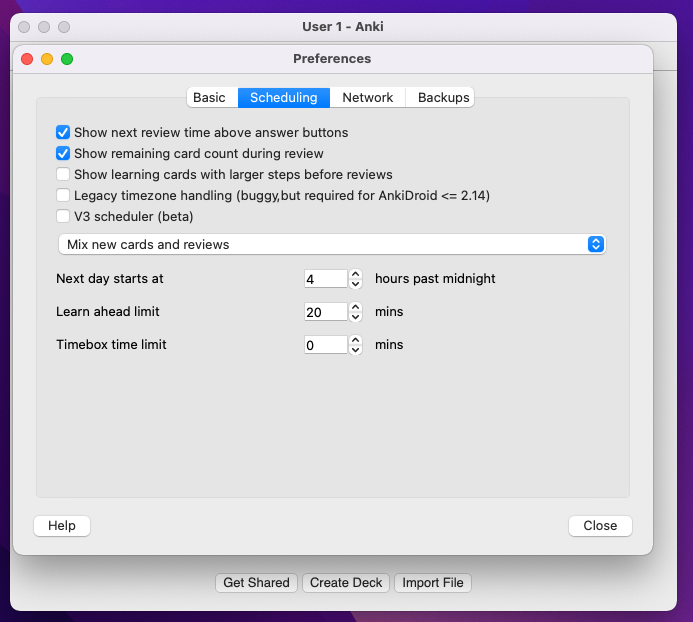
3. Settings
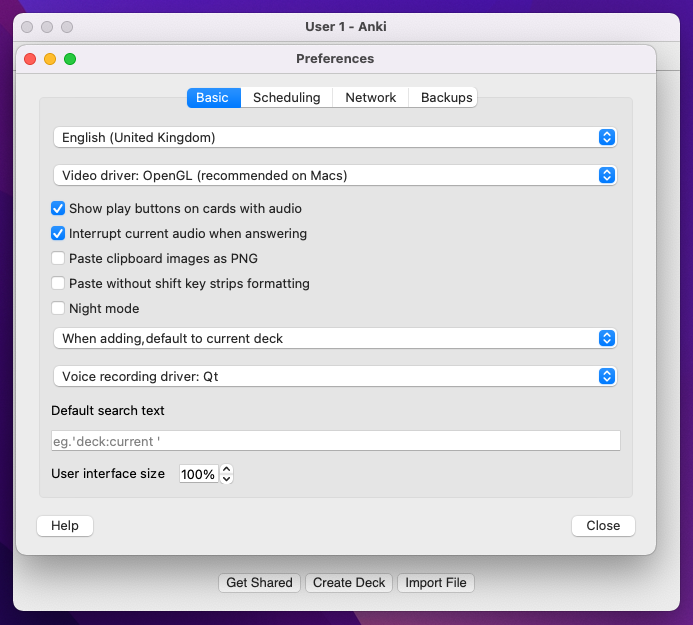
It's possible to spend a lot of time tweaking the settings if you are a more advanced user but I'll keep things simple for now. Go to the toolbar and select Anki > Preferences. I suggest keeping the following settings.
There is a good (but long) video here if you would like to go more in-depth into all the possible settings.
4. Make a deck (or decks)
Now it's time to start making cards! First you'll need to make a deck. To do this press the button that says 'Create Deck' at the bottom of the page. Then give your first deck a name.
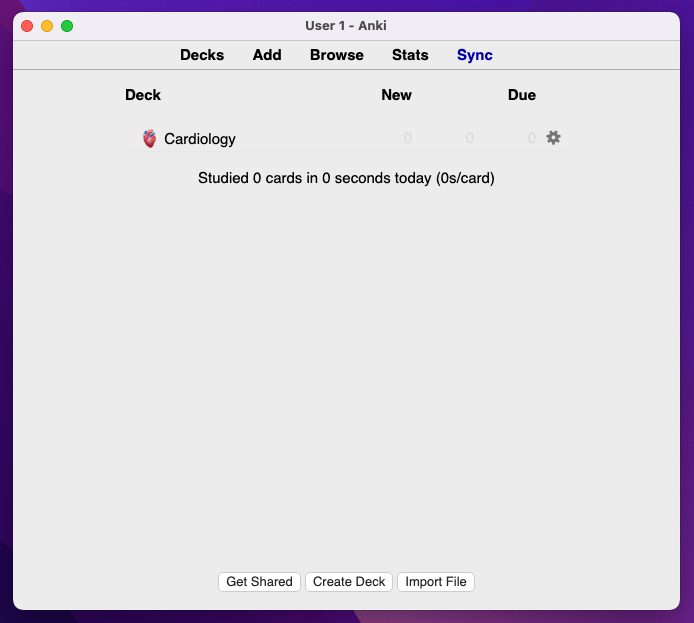
Make as many decks as you would like according to your preferences and your course. I like to spice things up by using emojis in the deck names 🔥.
5. Make cards
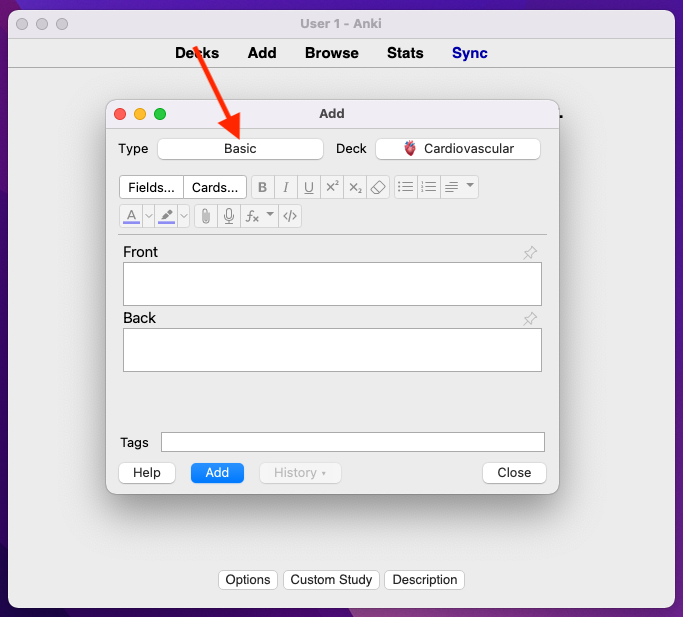
Click on the deck that you would like to make cards for and then press 'Add' near the top of the page. You should see something like below. Now you can choose the 'Type' of card you would like to make. Do this by pressing the button which says 'Basic' which I've pointed out with an arrow.
You should see a few card types to choose from. The two most popular ones are 'Basic' and 'Cloze' which I will briefly explain in turn.
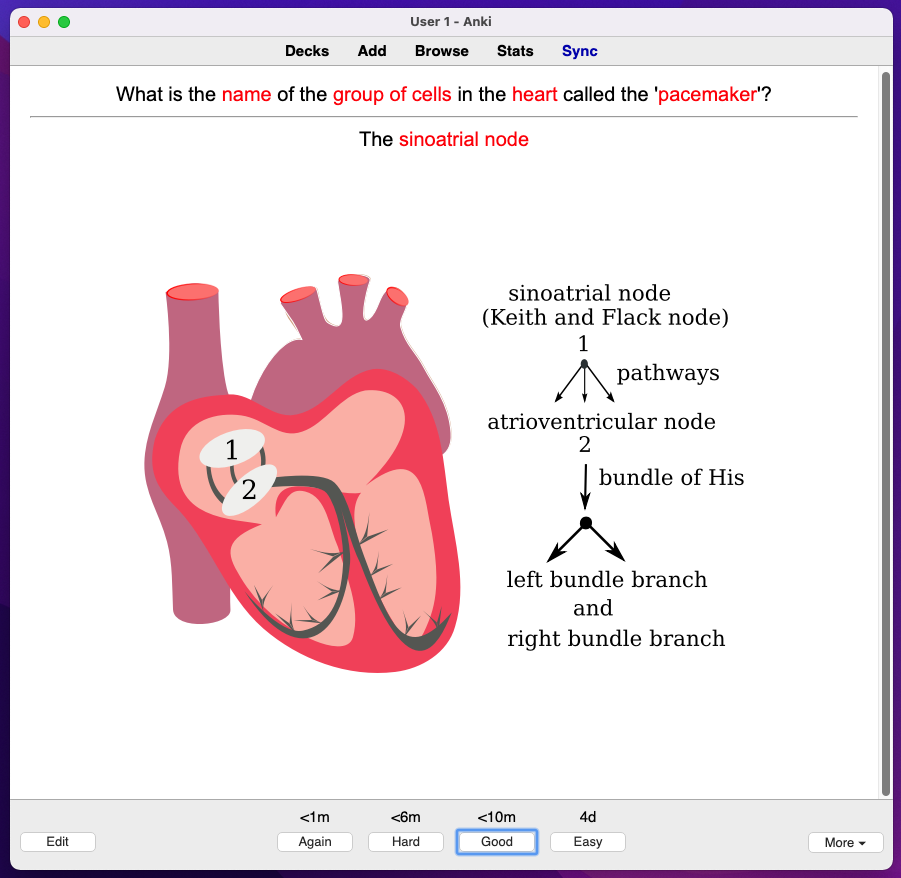
A 'Basic' card is exactly as the name would suggest — a basic flashcard. You type a question on the 'Front' and the answer on the 'Back'. You can also include media (images, gifs, audio etc.) and change font colours to make your cards look more interesting. See an example below.

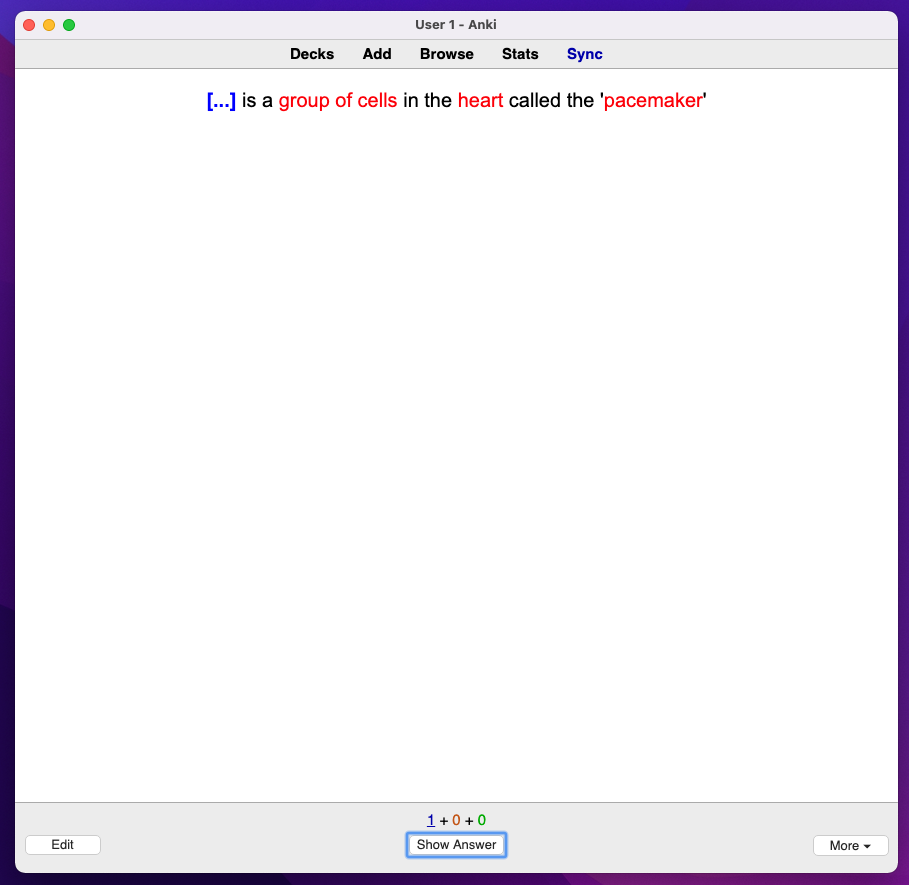
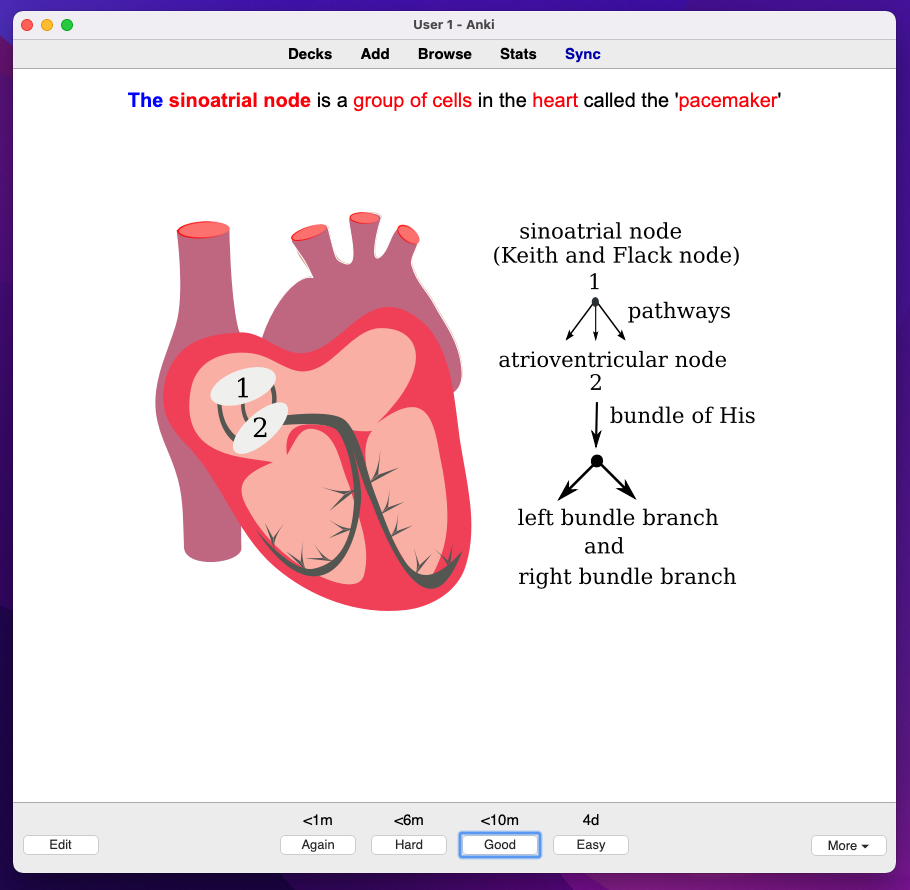
A 'Cloze' card allows you to blank out a certain word or group of words. It's essentially a guess the blank card. In the example below the same information is tested as above but using a cloze card.
Depending on the content you are studying you might want to use one style of card over another. This is mostly personal preference — some information lends itself better to a particular style and you'll find this out as you make cards.
6. The 'algorithm'
Now I will briefly explain the Anki 'algorithm'. This is the main reason to use Anki and yet the bit that most people get wrong.
Each time you answer a card you rate whether you found it 'Hard', 'Good' or 'Easy'. Your rating will then determine the scheduling of the card i.e. when Anki will show it to you again. If you said the card was hard it will show it to you sooner e.g. tomorrow. If you said it was easy it might show it to you after a week.
The more times you have seen a card the longer these intervals will become. Eventually it will become months (or even years) before you see a card again rather than days. As this interval of time increases gradually you should be able to retain the vast majority of your cards for the long-term. The benefit of the increasing interval size is that you can keep adding new cards (don't go too wild though or you will get overwhelmed) forever.
7. Final note
Lastly I would highly recommend reading this article. It has some great tips on making good flash cards and if you keep the rules mentioned in mind you will gain far more from using Anki.
Good luck on your Anki journey and feel free to contact me if you have any questions!